Valentine One Installation
This is my approach, YMMV:
- Mount V1 main unit above rear-view mirror with suction cup bracket
- Run supplied telephone wire through roof liner to driver's-side A-pillar
- Push wire between window and seal and between VIN plate and window
- Run wire around edge of dash and underneath
- Attach power interface with Velcro to metal box underneath dash by driver's left knee
- Attach interface power and ground to lighter wires located behind/beneath center console
- Run second telephone wire through instrument pod from beneath wheel to opening for windshield wiper stalk
- Cut wire to comfortable length and crimp new RJ-11 connector in place
- Mount bracket (SEE BELOW) to wheel column cover with double-stick padded tape (Velcro was too floppy)
- Mount remote display to bracket using double-stick padded tape
- Attach to remote display unit
- Connect all wires and enjoy!
To build the bracket, I got a spare piece of metal from an auto radio installer,
about 8" long. I bent it to conform to the shape of the wheel column cover,
cut it to the proper length, and covered it with real Italian leather from an old
wallet. I glued the leather into a tight-fitting tube around the bracket. I suppose
you could just paint it or cover it with tape (ugh!).
The main unit does not light up when the remote display is attached (it just knows).
There are separate volume controls for main warnings and muted warnings. The build
quality is excellent and all parts needed, except my patented mounting bracket, are
supplied. If you don't want lots of slack telephone wire, you'll need a modular
telephone crimper and RJ-11 ends, available from Radio Shack or the like.
Voilá!
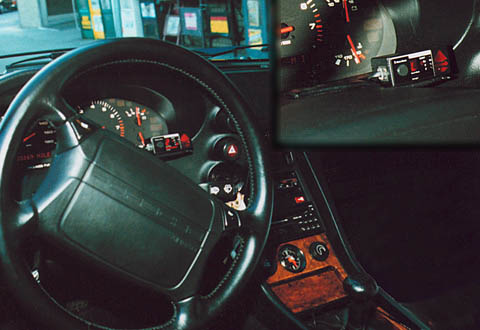
Of course, you should listen carefully for the audio warning tone while making sweeping
left-hand turns.
[top of this page] ·
[Porsche 928 Page]
Copyright © 1998-1999 John Turkel. All rights reserved.
Last Modified November 23, 1998
/